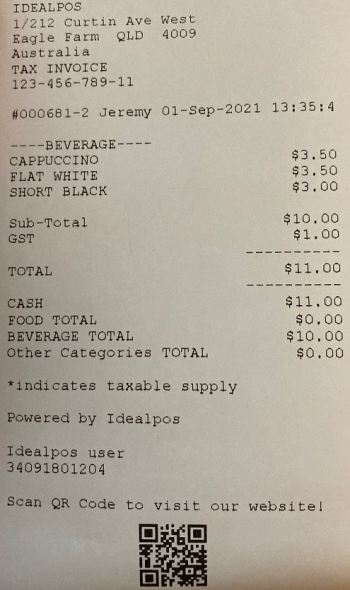
QR Codes can be printed on Arabic receipts.
In order to enable and configure this function, you will need to complete additional configuration.
Note that some configuration may have already been completed on your system; the below steps are listed for completeness.
Note!
This topic is only applicable to POS Terminals which have been set to the "Saudi Arabia" region!
The region is configured via: Back Office > Setup > POS Terminals > Select Terminal > Modify.
In the Region dropdown box, "Saudi Arabia" must be selected.
In this example, a TP-100 printer was used and the Printer Driver was obtained from www.senortech.com.au, however, this will differ depending on the make and model of the printer being used.
The below steps are for the TP-100 Printer:
Install the TP-100 Printer Driver by pressing "Next" through the installation process.
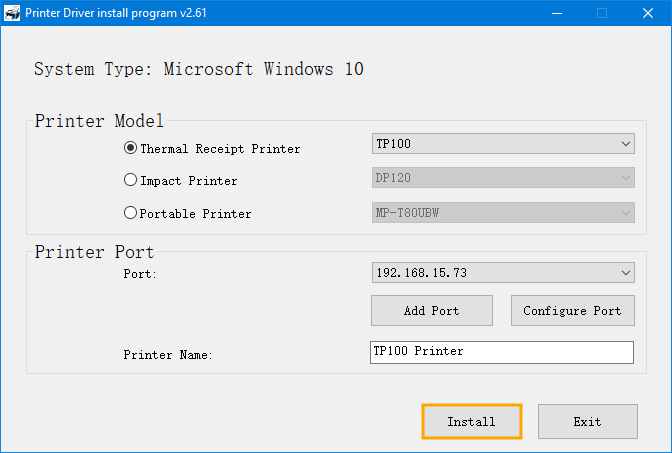
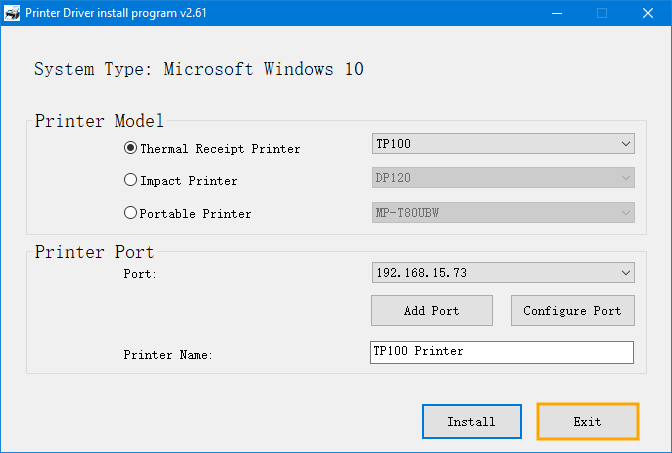
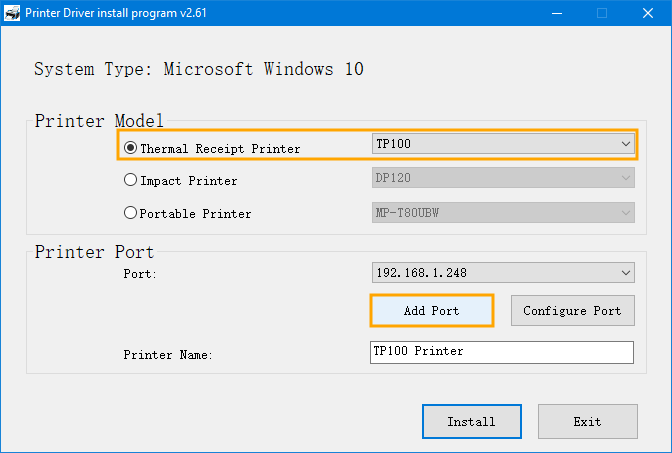
Once the Printer Driver install program is displayed, select the Printer from the dropdown box, then press the "Add Port" button as shown in the example below:
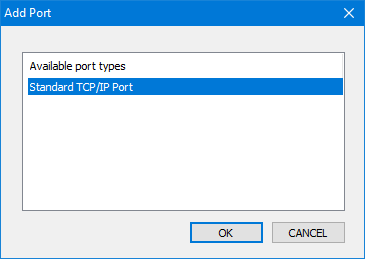
Select "Standard TCP/IP Port"
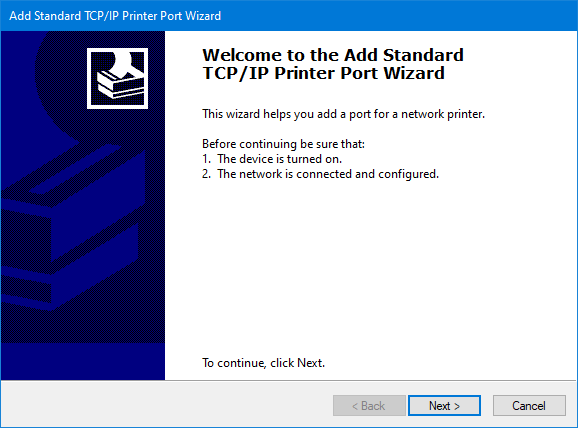
Press "Next" on the "Add Standard TCP/IP Printer Port Wizard".
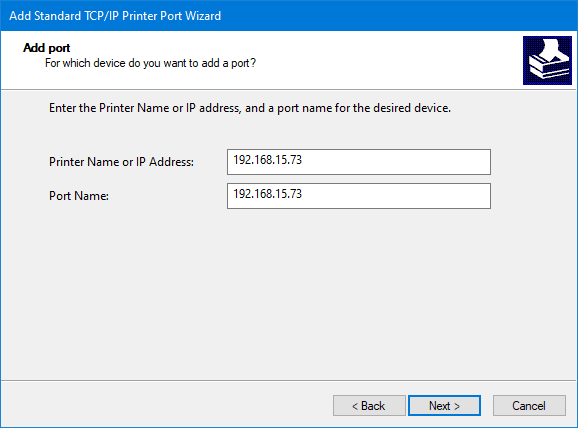
Enter the IP Address of the printer, then press "Next".
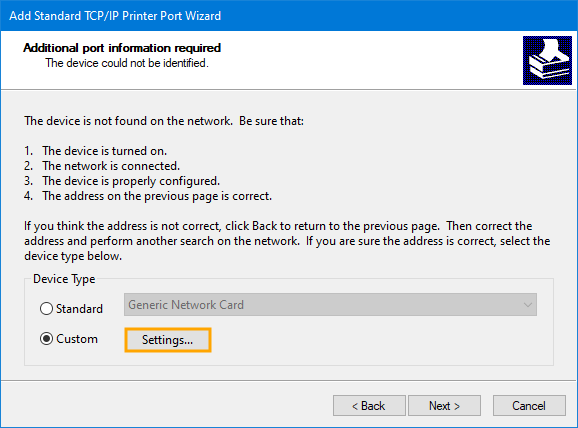
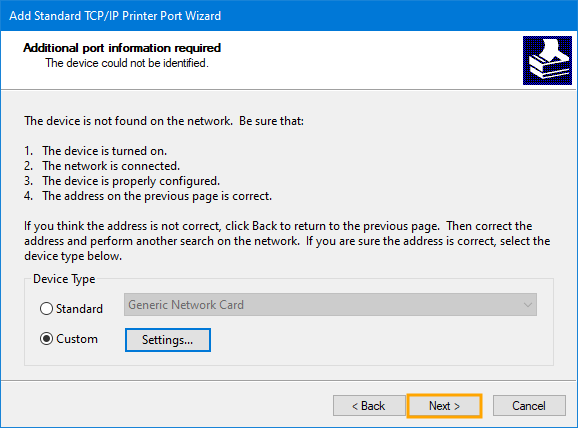
It is more than likely that the device won't be found on the network.
Select "Custom" and press "Settings".
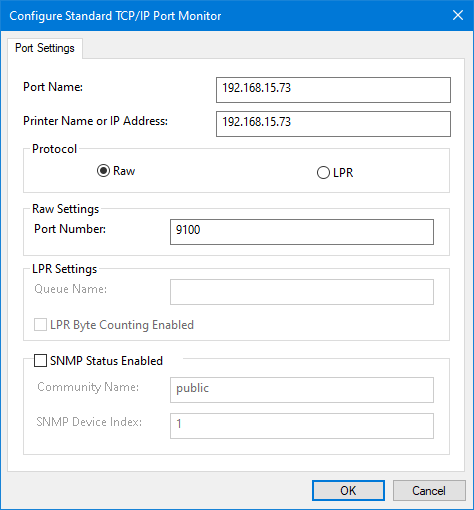
A window similar to the following will be displayed.
Confirm that the Printer IP Address appears in the Port Name and Printer Name or IP Address fields as shown in the below example, then press "OK"
Press "Next" on the "Add Standard TCP/IP Printer Port Wizard"
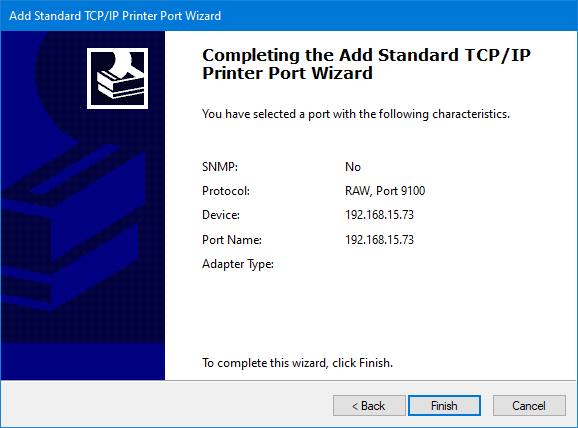
Press "Finish" to complete the "Add Standard TCP/IP Printer Port Wizard".
The Printer Driver install program will show the IP address of the printer next to the Port field.
Press the "Install" button to install the Printer Driver using the IP address settings that were just configured.
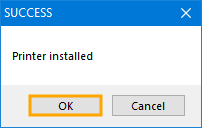
After the driver has been installed, a SUCCESS prompt will be displayed. Press "OK" to continue.
The Printer Driver install program will appear.
Press the "Exit" button to close the driver installer.
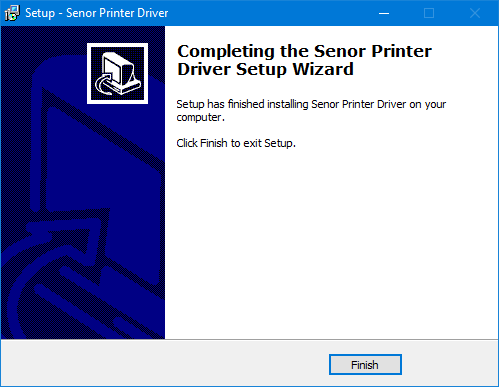
Press the "Finish" button on the Senor Printer Driver installer.
Now that the Printer Driver has been installed, you will need to Share the Printer, enable "Allow" access on the Printer Security settings and disable paper cut.
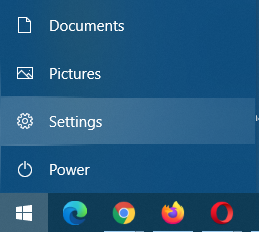
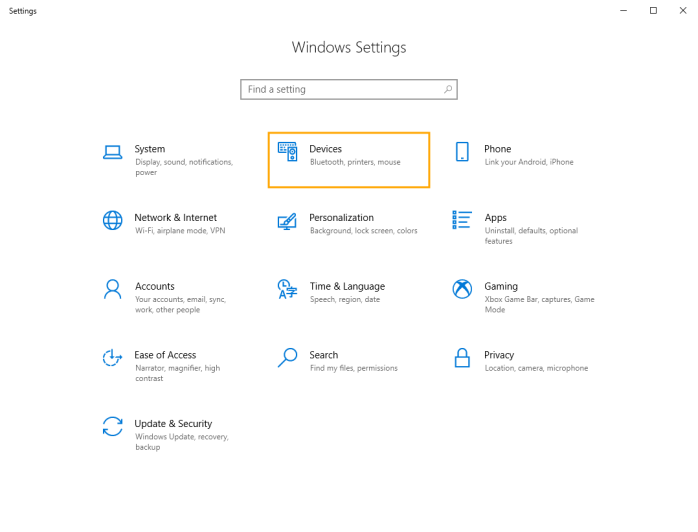
Go to: Windows Start button > Settings
Select "Devices, Bluetooth, printers, mouse".
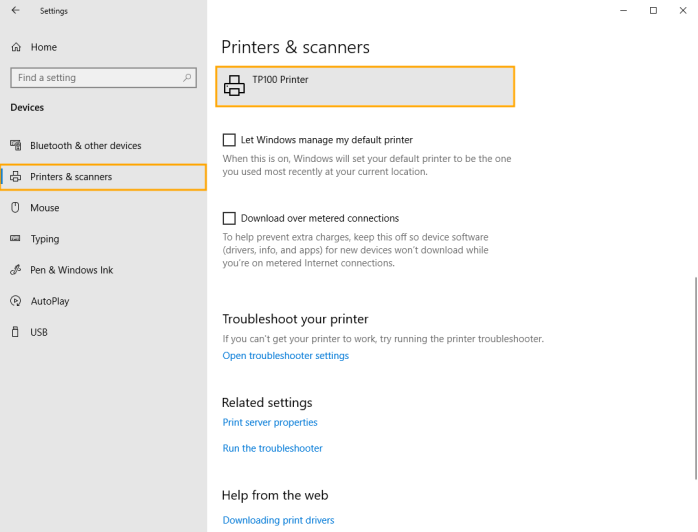
Select "Printers & scanners" from the menu on the left-hand side, then select the TP100 Printer on the right-hand side:
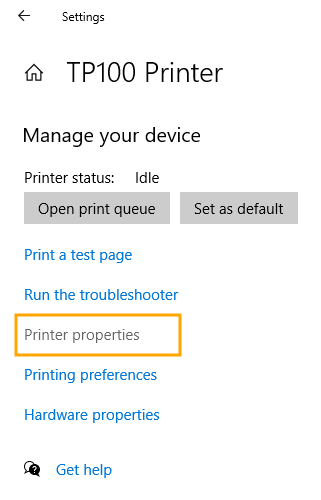
After selecting the TP100 Printer, additional buttons will appear.
Select "Manage".
Select "Printer properties".
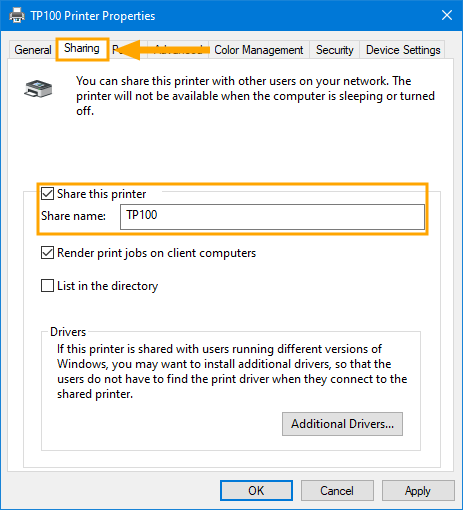
Go to the Sharing tab, enable "Share this printer" and enter a Share name of "TP100".
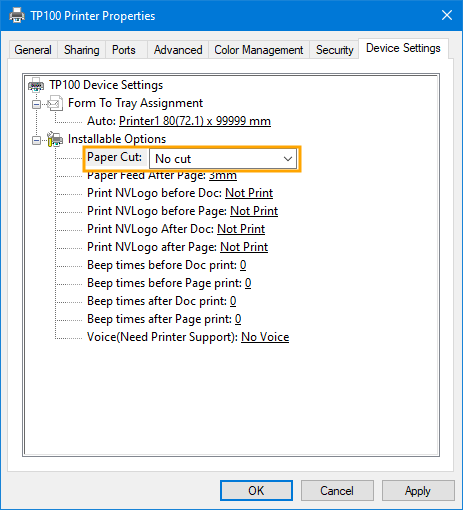
Go to "Device Settings" and set the Paper Cut setting to "No cut".
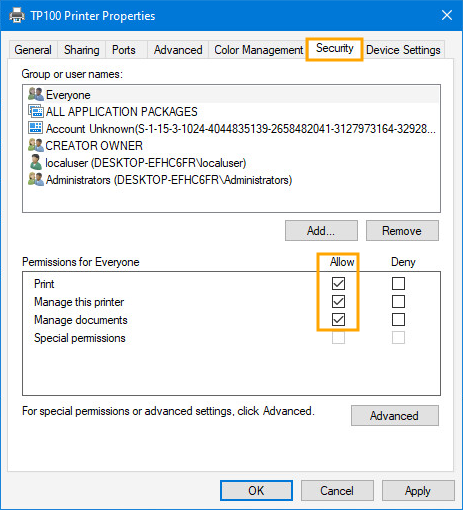
You will also need to enable Allow access to the printer for all users.
Go to the "Security" tab and enable all checkboxes in the "Allow" column for Everyone and each User.
Press "OK" to close and save all changes to the TP100 Printer properties.
Go to: Idealpos > Back Office > Setup > POS Terminals > Select POS Terminal > Modify.
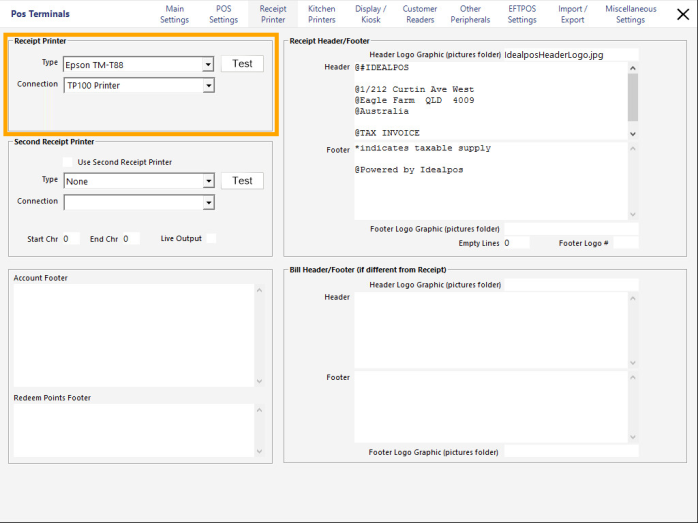
In the "Receipt Printer" tab, configure the Receipt Printer.
Set Type to "Epson TM-T88".
Set Connection to: Same Printer Name as configured in Windows
WARNING!
If you enter incorrect details into the Connection field and press the "Text" button (which results in a failed test print), entering correct details and pressing "Test" may also result in a failed test print, even though the Connection setting was corrected and should have yielded a successful result.
To ensure that the printer connection settings have been applied, you may need to close the POS Terminals setup window, re-open the POS Terminals setup window, then try the Test button again to ensure that the updated Receipt Printer Connection settings are being used for the test print.
If the receipt printer is not the Windows Default Printer, go to: Back Office > Setup > POS Terminals > Select Terminal > Modify > POS Settings.
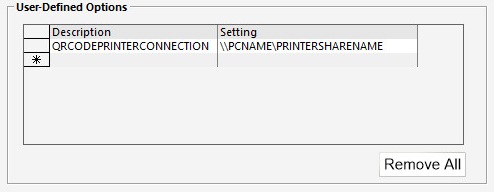
Add the following User-Defined option.
Description: QRCODEPRINTERCONNECTION
Setting: Enter the \\PCNAME\SHARE.
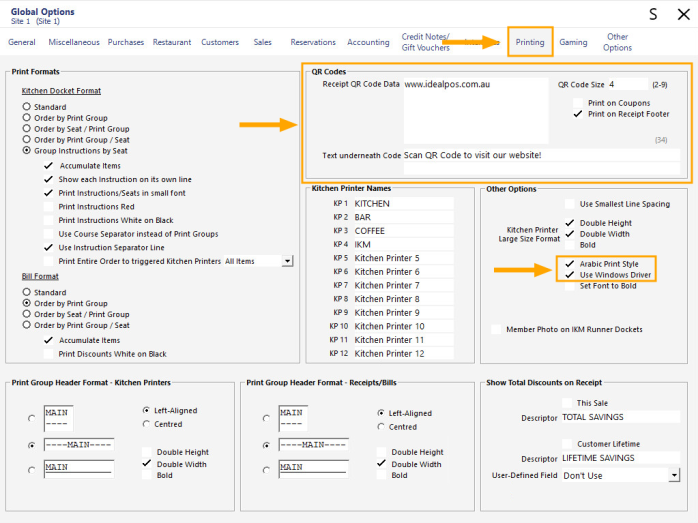
In Idealpos, go to: Setup > Global Options > Printing.
Enable the following options:
* Arabic Print Style
* Use Windows Driver
To enable QR Codes on your receipt, also ensure that you enable and configure the following settings:
* QR Code Size (to ensure that the size of the QR Code is prominent on the receipt, we recommend a size of 4 or greater).
* Enable Print on Receipt Footer
* Enter the Receipt QR Code Data - This can be any data you want to embed in the QR Code such as your company website, etc. When the Customer scans the QR Code, their mobile device will read the data.
* Text underneath Code - This is any text that you want printed below the QR Code (e.g. Scan the QR Code to visit our website!).
This concludes the configuration required for setting up a printer with QR Codes on Arabic Receipts.
When a receipt is printed, it will contain the QR Code at the bottom of the receipt.